
DrissionPage检测点与修改DP源码通过所有run_js检测
检测
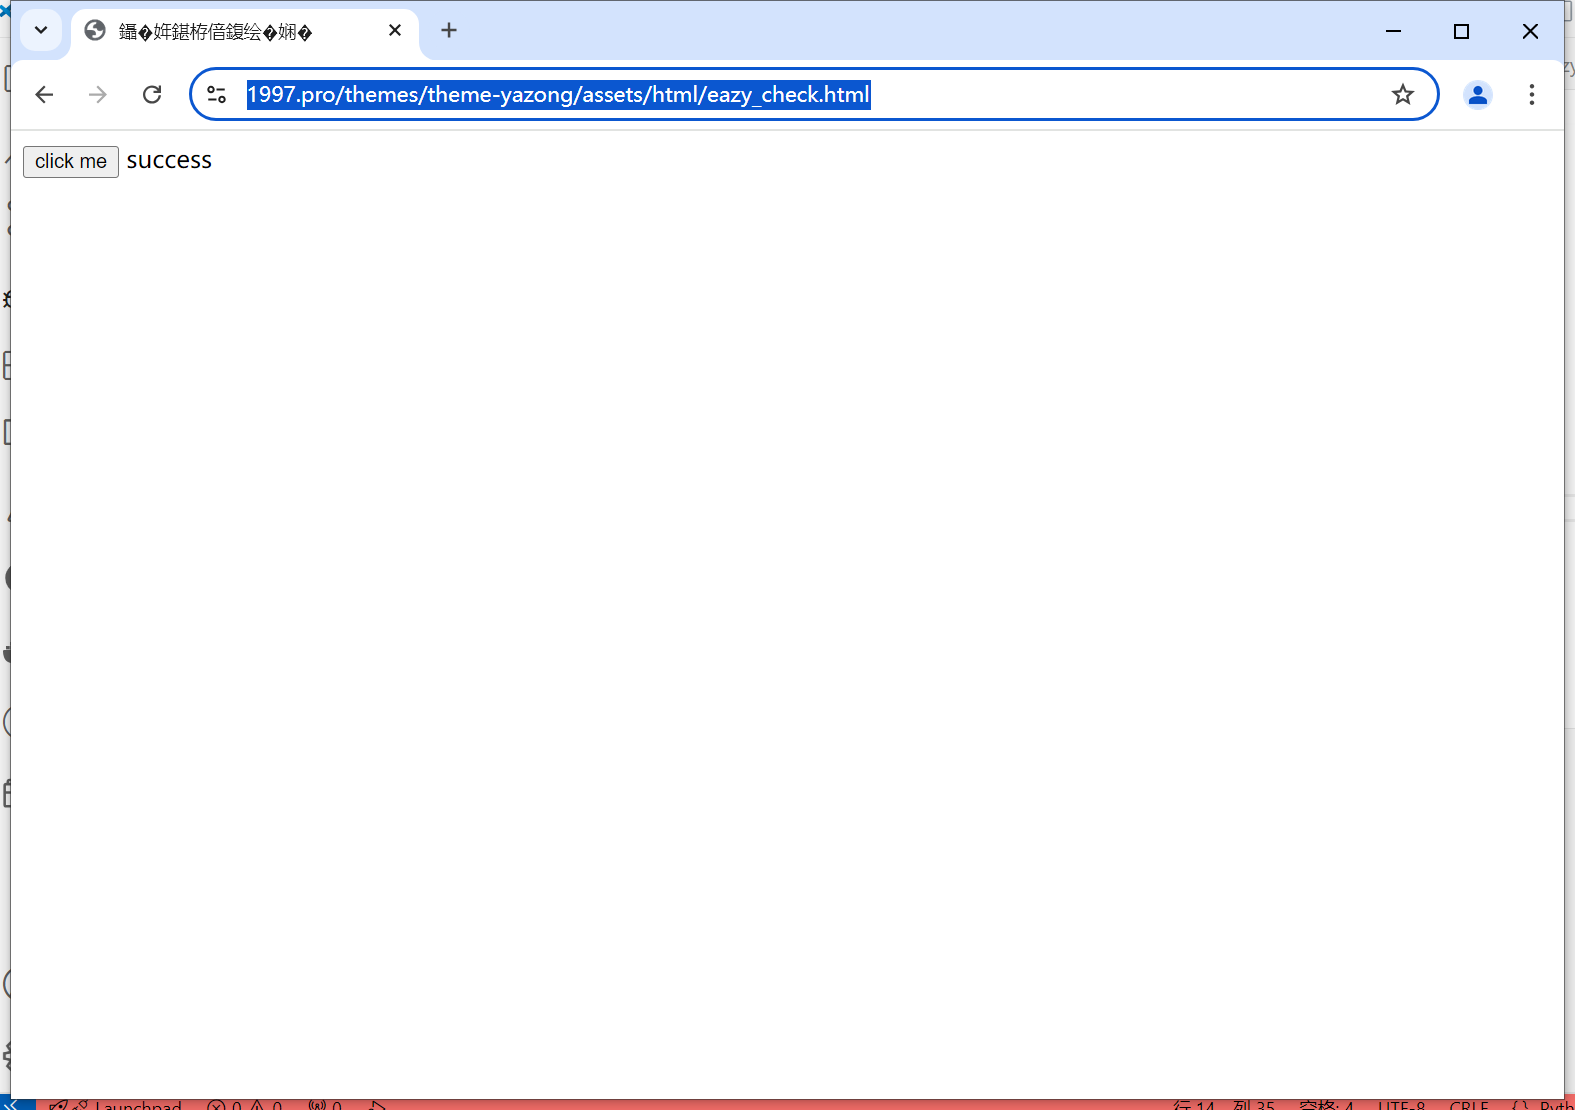
dp检测(简单版):
https://1997.pro/themes/theme-yazong/assets/html/eazy_check.html
先用dp的普通写法尝试点击:
import random
from DrissionPage import ChromiumPage
random_port = random.randint(9000, 30000)
cp = ChromiumPage(addr_or_opts=random_port)
cp.get('https://1997.pro/themes/theme-yazong/assets/html/eazy_check.html')
button = cp.ele('xpath://button')
button.click()
input("press enter to continue")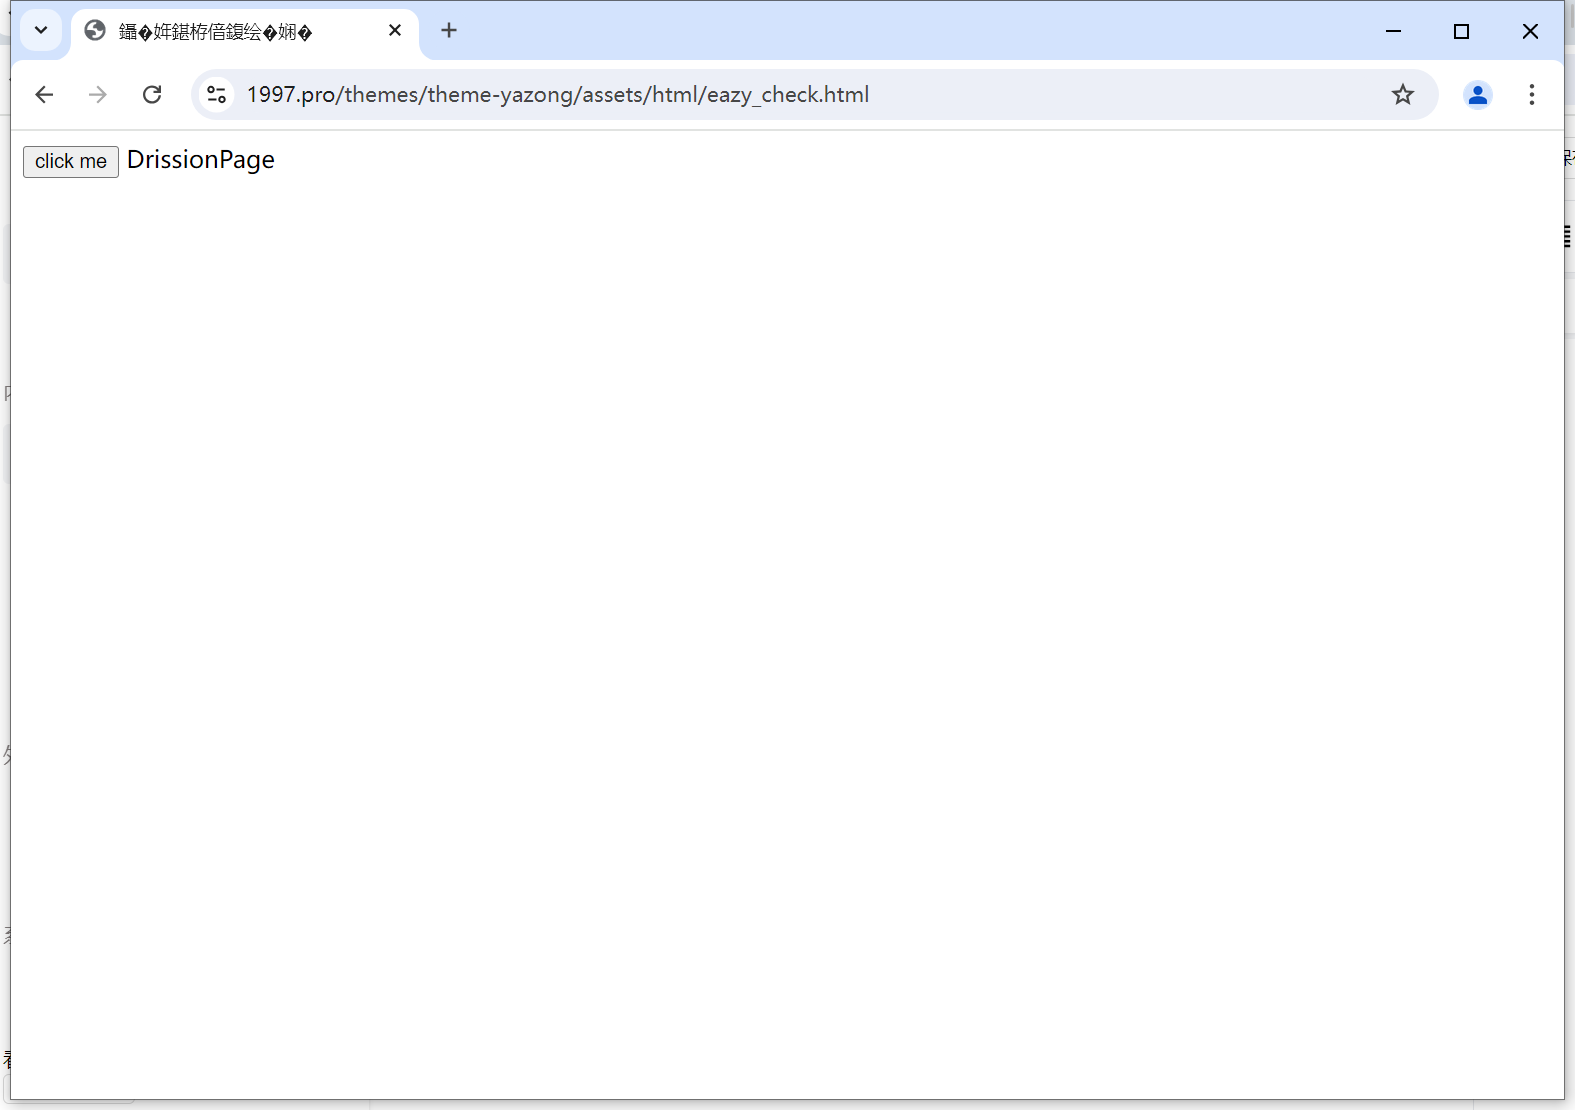
可以看到,检测到了点击来自dp。
检测原理
先来看看检测源码:
var textArea = document.getElementById('textarea');
window.originGetComputedStyle = window.getComputedStyle;
window.record1 = 0;
window.getComputedStyle = function(){
    window.record1++;
    return window.originGetComputedStyle(...arguments);
}
            Element.prototype.originScrollIntoViewIfNeeded = Element.prototype.scrollIntoViewIfNeeded;
window.record2 = 0;
Element.prototype.scrollIntoViewIfNeeded = function(){
    window.record2++;
    return this.originScrollIntoViewIfNeeded(...arguments);
}
window.addEventListener('click', function(event){
    trusted = event.isTrusted;
    window.getComputedStyle(document.body, null)
    window.record1--;
    document.body.scrollIntoViewIfNeeded(true);
    window.record2--;
    if (window.record2 !== 0 || window.record1 !== 0) {
        textArea.innerHTML = 'DrissionPage'
    } else if (!trusted) {
        textArea.innerHTML = 'js/webdriver'
    } else {
        textArea.innerHTML = 'success'
    }
});
简单来说,就是hook了window.getComputedStyle和Element.prototype.scrollIntoViewIfNeeded,当这两个函数被调用后,便判定为drission page操作(这里只是demo,实际情况下,getComputedStyle是个很常用的函数,所以不会这么简单的判断,而是链式判断。至于什么是链式判断,接着往下看)
先来看看为什么这样能检测到drission page,翻下drission page的源码
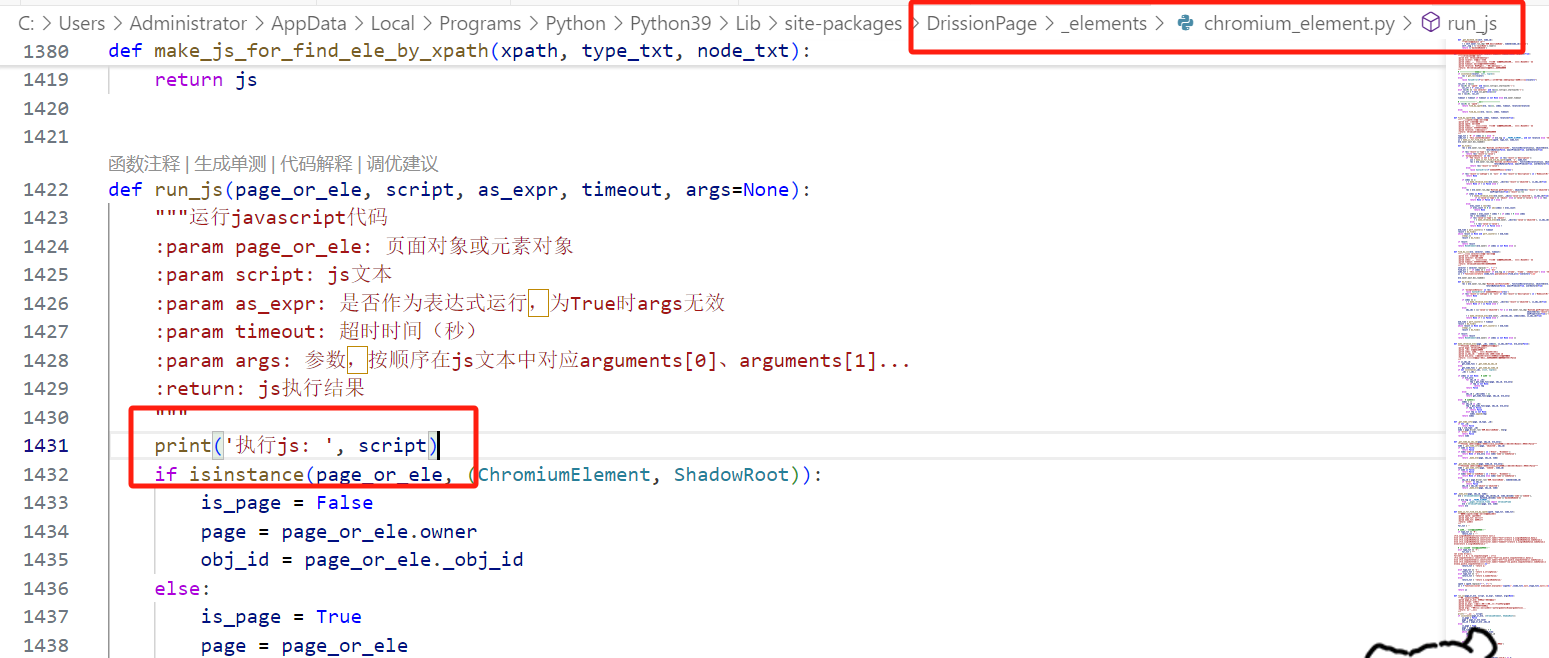
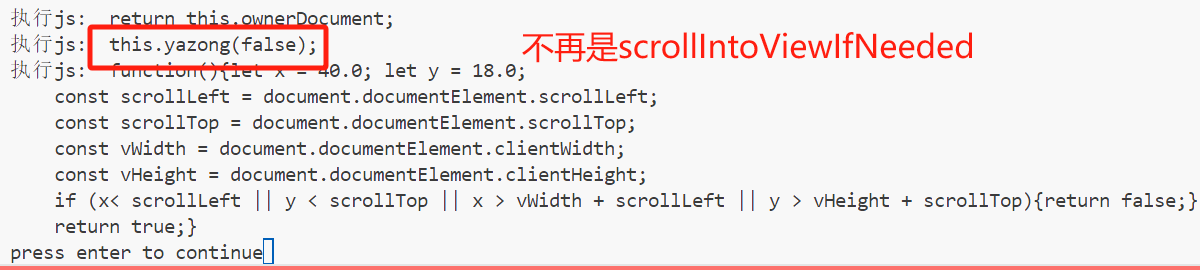
在上图的源码相应位置增加print后,再执行刚才的python脚本点击,会发现打印如下:
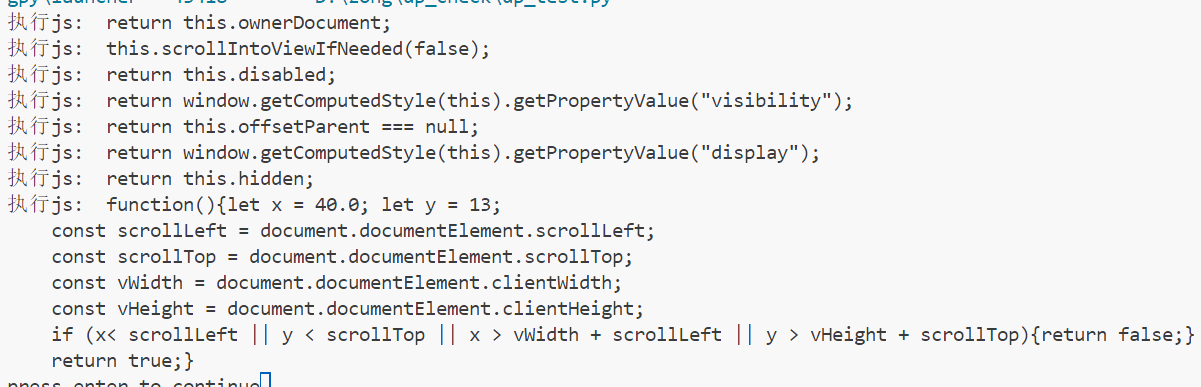
在执行ele函数选取页面元素时,dp会执行this.ownerDocument获取元素,在执行click时,dp则会执行如下:
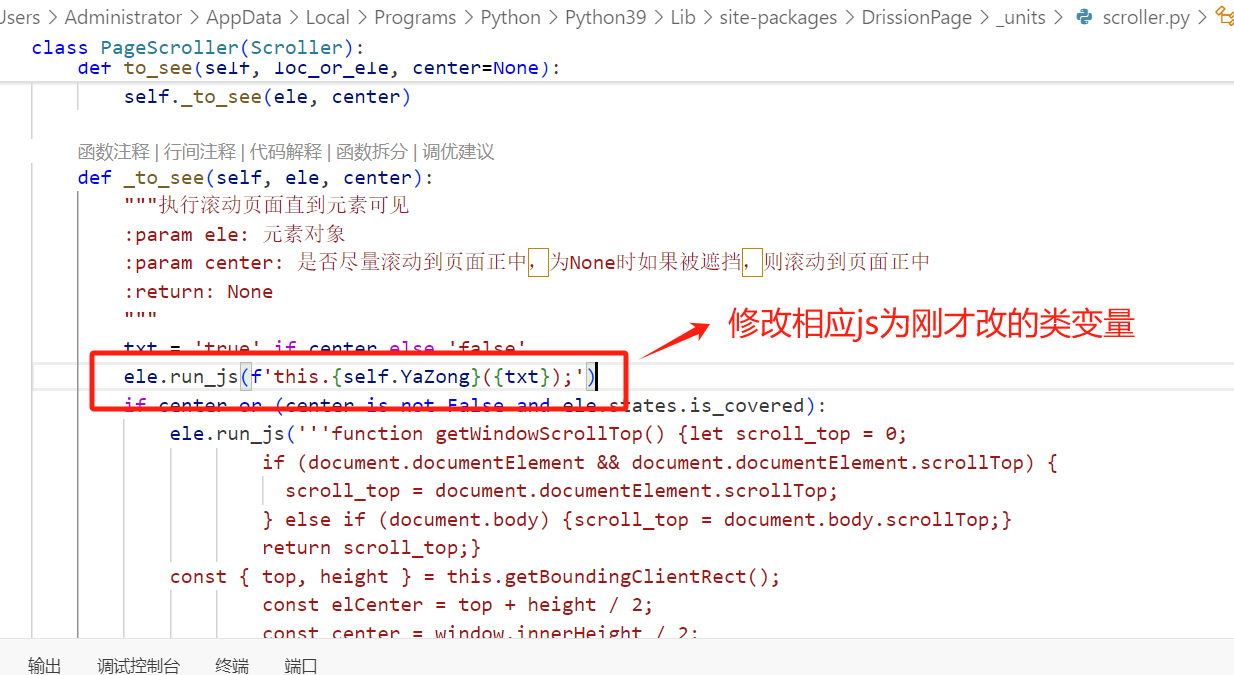
行js:  this.scrollIntoViewIfNeeded(false);
执行js:  return this.disabled;
执行js:  return window.getComputedStyle(this).getPropertyValue("visibility");
执行js:  return this.offsetParent === null;
执行js:  return window.getComputedStyle(this).getPropertyValue("display");
执行js:  return this.hidden;
执行js:  function(){let x = 40.0; let y = 13;
    const scrollLeft = document.documentElement.scrollLeft;
    const scrollTop = document.documentElement.scrollTop;
    const vWidth = document.documentElement.clientWidth;
    const vHeight = document.documentElement.clientHeight;
    if (x< scrollLeft || y < scrollTop || x > vWidth + scrollLeft || y > vHeight + scrollTop){return false;}
    return true;}
可以看到运行了一大坨js。
上面说到的链式判断就是,当提前hook这些函数以及属性,发现scrollIntoViewIfNeeded、disabled、getComputedStyle、offsetParent......在短时间内被依次调用后,就可以确定该次点击为dp点击。
修改DP
想要完美过run_js的检测,直接删除run_js肯定是不行的,因为dp的很多功能目前都依赖于js。因此要基于run_js做出修改,思路如下:
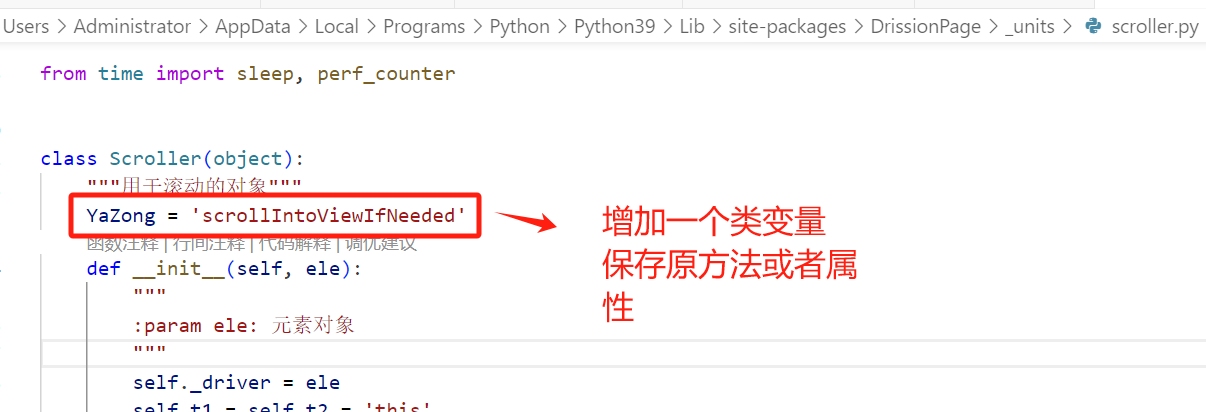
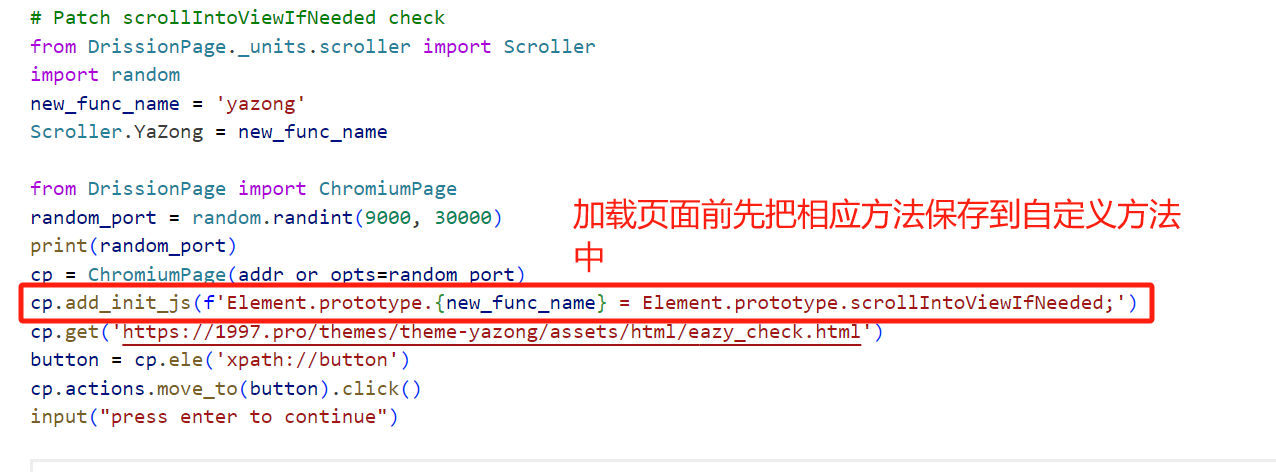
在页面加载时,率先把dp需要执行的函数保存到自定义对象中
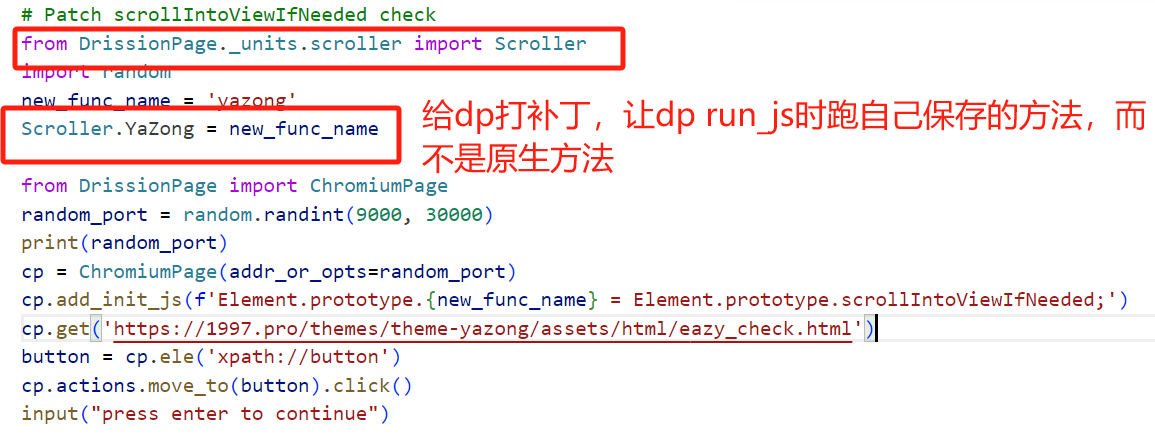
将dp源码中的执行的这些函数改为执行自己提前保存好的函数
通过以上两步,再使用dp做各种操作,便不会被hook到特征,同时又能保证原函数正常被网页的其它js调用。
比如上面的scrollIntoViewIfNeeded检测,先找到dp运行scrollIntoViewIfNeeded的位置:
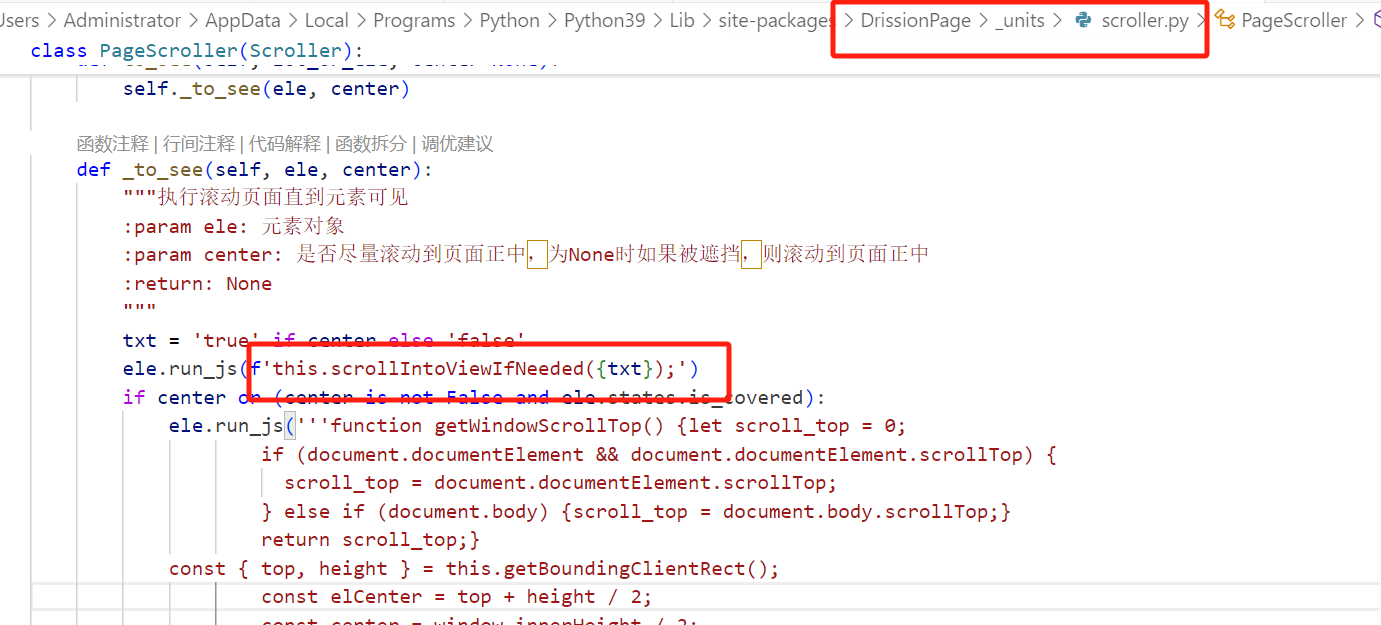
然后做如下改动:
这时候再运行:
可以看到成功通过检测。
根据以上方法,把常见操作(滑动、点击、输入等)的run_js做对应更改,在源码的浏览器初始化部分加入add_init_js来修改run_js用到的方法/属性,然后在各个run_js调用部分修改为调用相应方法/属性为自定义的方法/属性,即可避免被检测到dp的run_js特征。
下面打个不算广告的广告:
风控是对抗不动了,后续更新会水一些常见或颇有难度的检测点,包括且不限于自动化、补环境、控制台、网络层等检测。
单项检测都会写成demo放在这儿(大多数都是抄的国外风控):https://1997.pro/test
会陆续更新检测以及对抗实例。为了防止正向人员恶意利用检测代码,大多数检测都用了零点大佬的喵喵盾和自己写的垃圾vmp加固,检测原代码会在水文时放出来,同时放出解决方案,就这样= =